讀了近三年資訊科(半年電子科/兩年多資訊科),blog 其實鮮少有我課程中實際所學的東西,目前臺灣技職體系,資訊科還是隸屬於電機與電子群(電子),所以我們統測大部分的考科都還是硬體相關的理論/實務知識,所安排的課程大概也是電相關的,畢業前應該要來一篇與我高職所學相關的東西!
工科賽完後,緊湊著乙級檢定術科的日子也要到來,必須要在不到兩個月內的課餘時間獨自練習(班上 30 人乙級考科分佈為 5/30 考 電腦軟體應用 24/30 考 電腦硬體裝修 1/30 考數位電子),總算在上周六順利通過乙級數位電子術科測驗,因為練習的時間緊湊,從原先的徬徨到後來漸漸上手到最後的游刃有餘,過程中累積了一些經驗、最佳實踐(Best Practice),留下筆記供有需要應考乙級數位電子的人做參考。
閱讀這份最佳實踐(Best Practice)前,建議先對乙級數位電子術科各個項目有一定的了解,最佳實踐(Best Practice)顧名思義是優化實踐的過程,所以不會有太多理論/完整的說明,只會提供我在練習過程中最優的實踐法則,這些實踐法則都有經過實際燒錄、測試機臺實際測試,當然你也可以認為這是我個人的筆記。
簡章下載
考試只有應檢參考資料(簡章)可以閱覽,所以最終目標就是要看應檢參考資料就有辦法完成作業,所以請熟悉閱覽數位電子乙級技術士技能檢定術科測試應檢參考資料。
學科準備
數位電子學科比起 電腦軟體應用、電腦硬體裝修來說,難度較高,所以建議多花一些心思去準備,可以盡量了解題目的原理,在應答上會更加得心應手。
數位電子學科有極大的比例會從歷屆試題中出現,以我自己實際去考學科的經驗,新題目大概只有佔到 10% 左右,甚至更少。
數位電子學科建議從 97 年之後的歷屆試題開始準備起,因為 97 年有換過考試架構,所以從 97 年的學科開始準備即可。
建議將學科的題目列印出,看過一遍將不會的題目標註起來,確定某個梯次的歷屆試題大致準備完成之後,在前往士林高商所建立的乙級測驗系統進行練習。
學科資源
術科準備
術科主要分成三個部分,設計母板電路圖(方格紙繪製)、焊接板子(母板、子板)、CPLD 設計(硬體描述語言撰寫(VHDL) or 原理圖設計(Schematic Diagram),下面一一說明。
還有,個人建議先把一題完整弄熟,只要一題可以弄熟的話,後面兩題就可以無師自通!
設計母板電路圖(方格紙繪製)
方格紙繪製上面有一些規則需要遵守(請查閱數位電子乙級技術士技能檢定術科測試應檢參考資料 54 頁開始) ,由於種種原因這部分暫時先略過不寫。
焊接板子
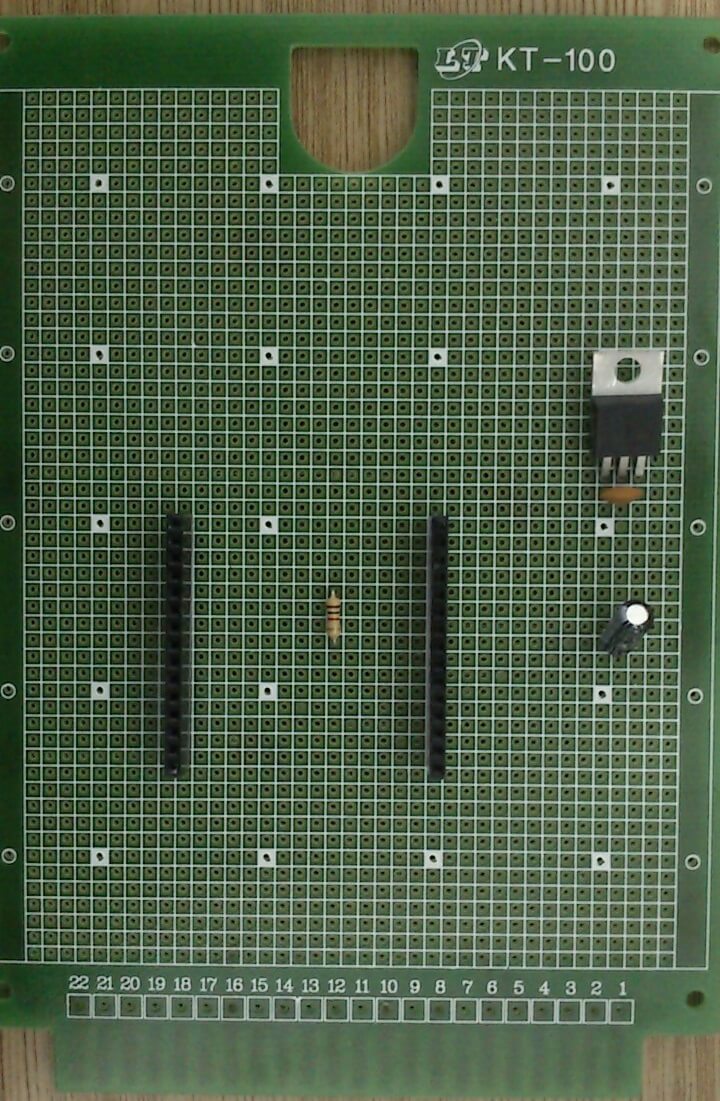
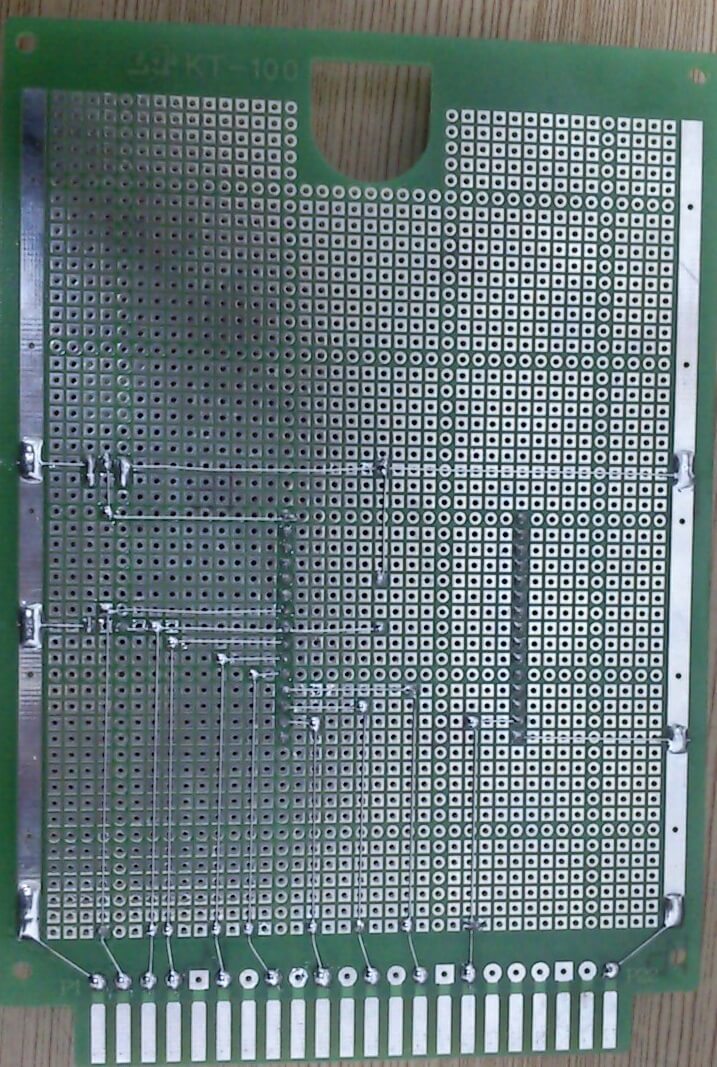
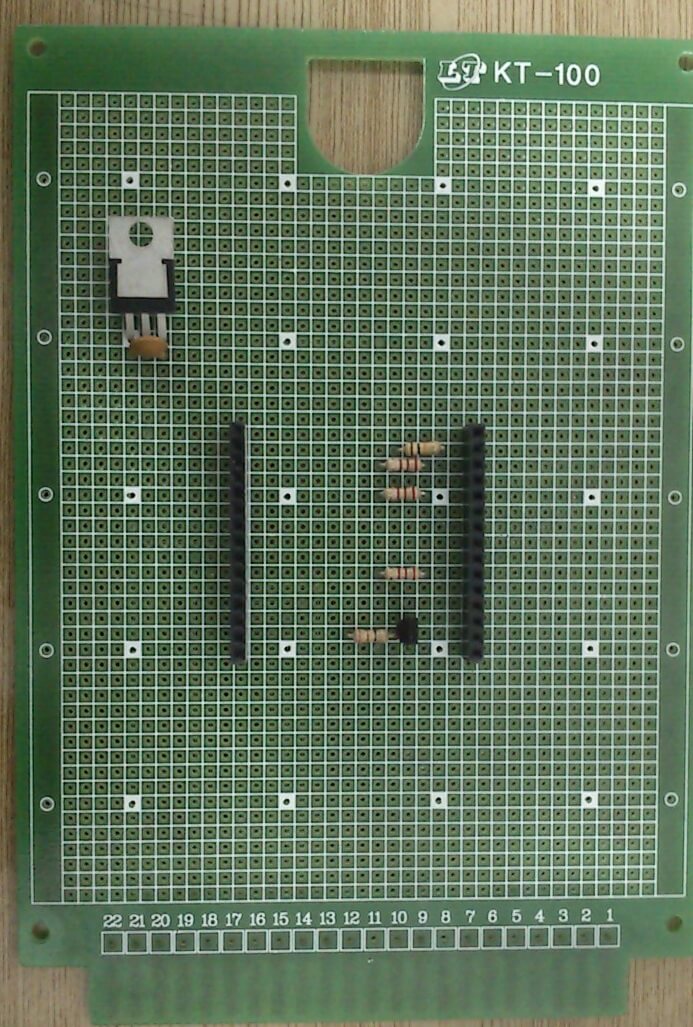
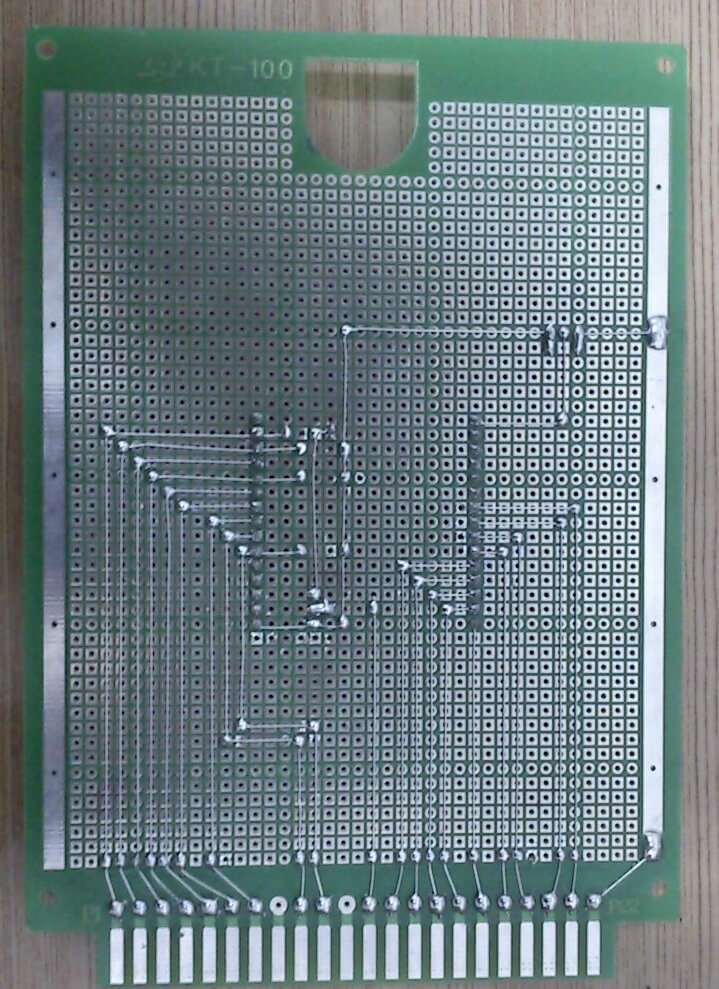
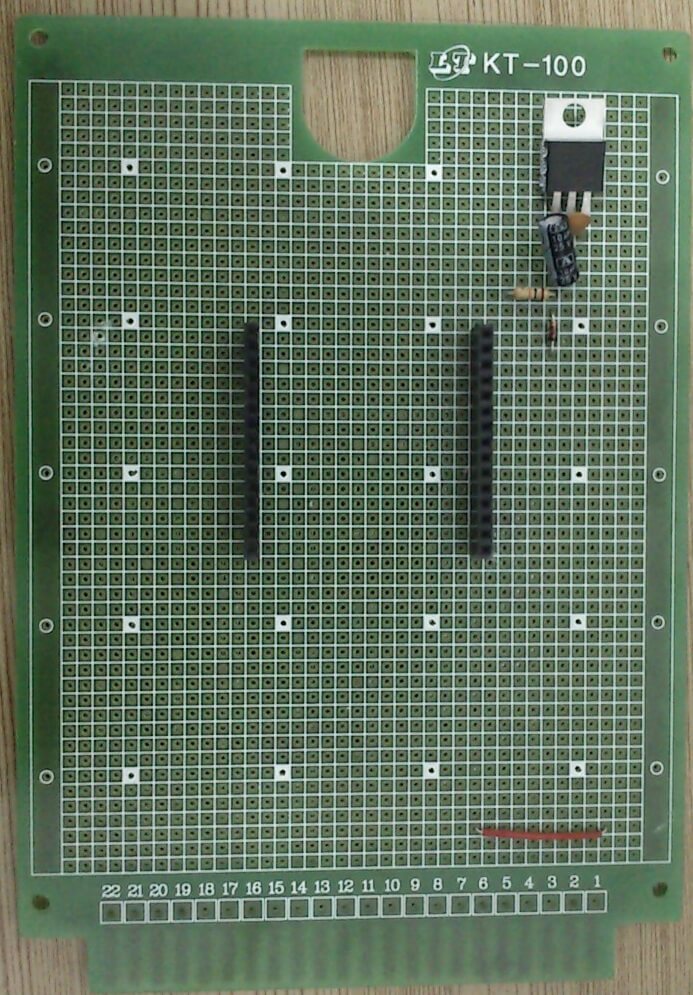
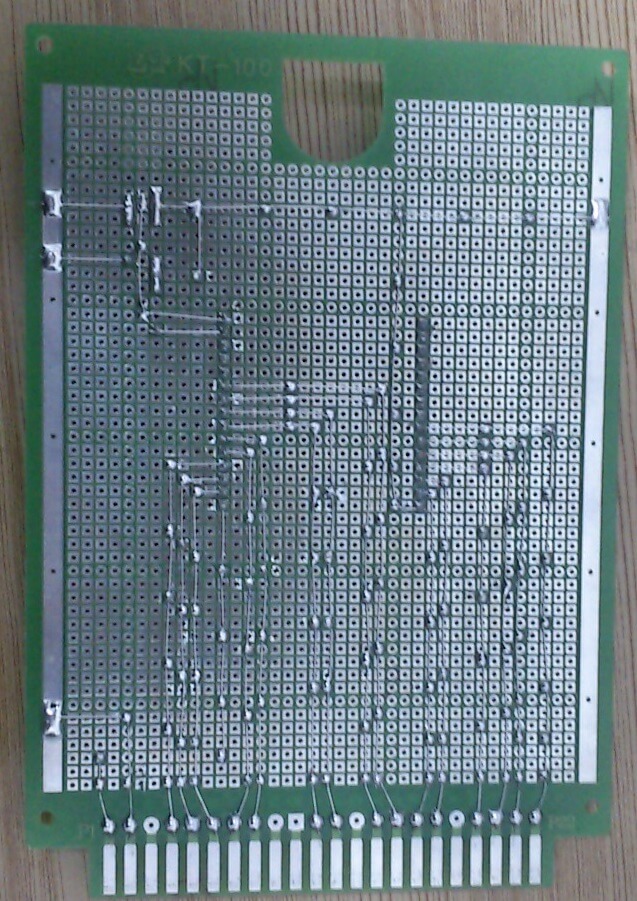
下面直接提供我焊接的成品圖,三年前的相機,所以拍得很清晰,不過正常仿製應該不會有太大問題。記得依造焊接規則焊接,並記得要補點。
第一題:四位數多工顯示器
第二題:.鍵盤掃瞄裝置
※注意穩壓 IC 的擺放
第三題:數位電子鐘
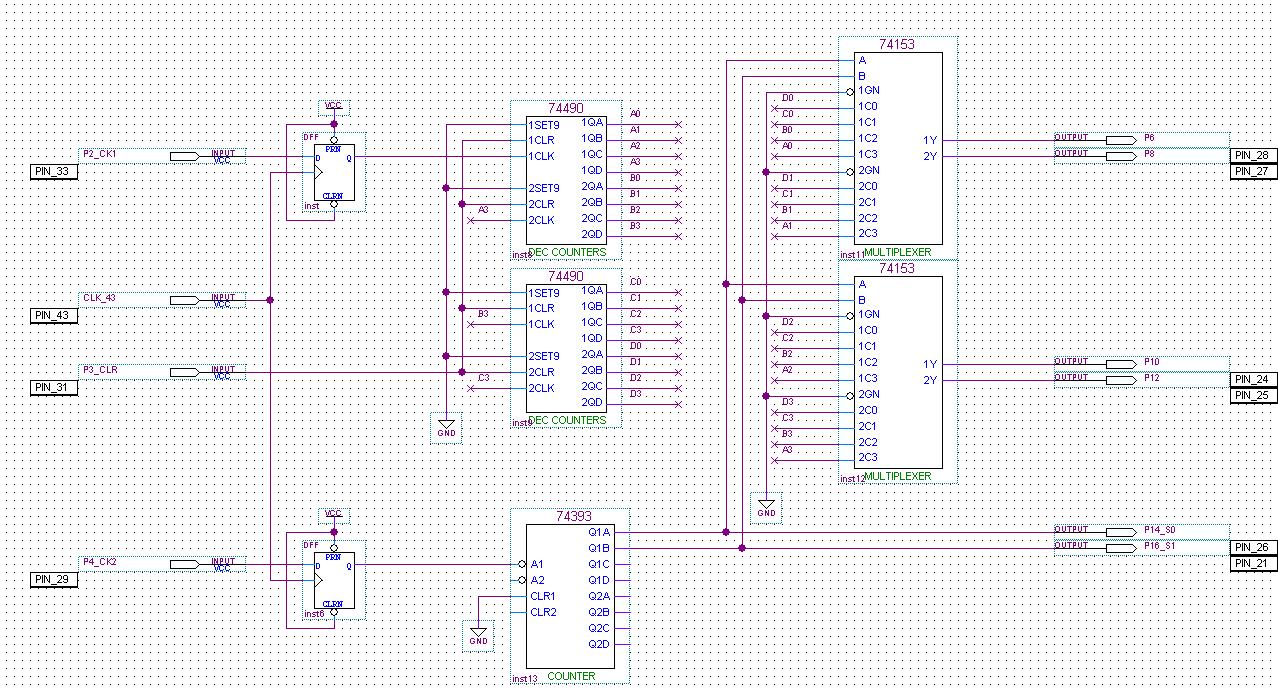
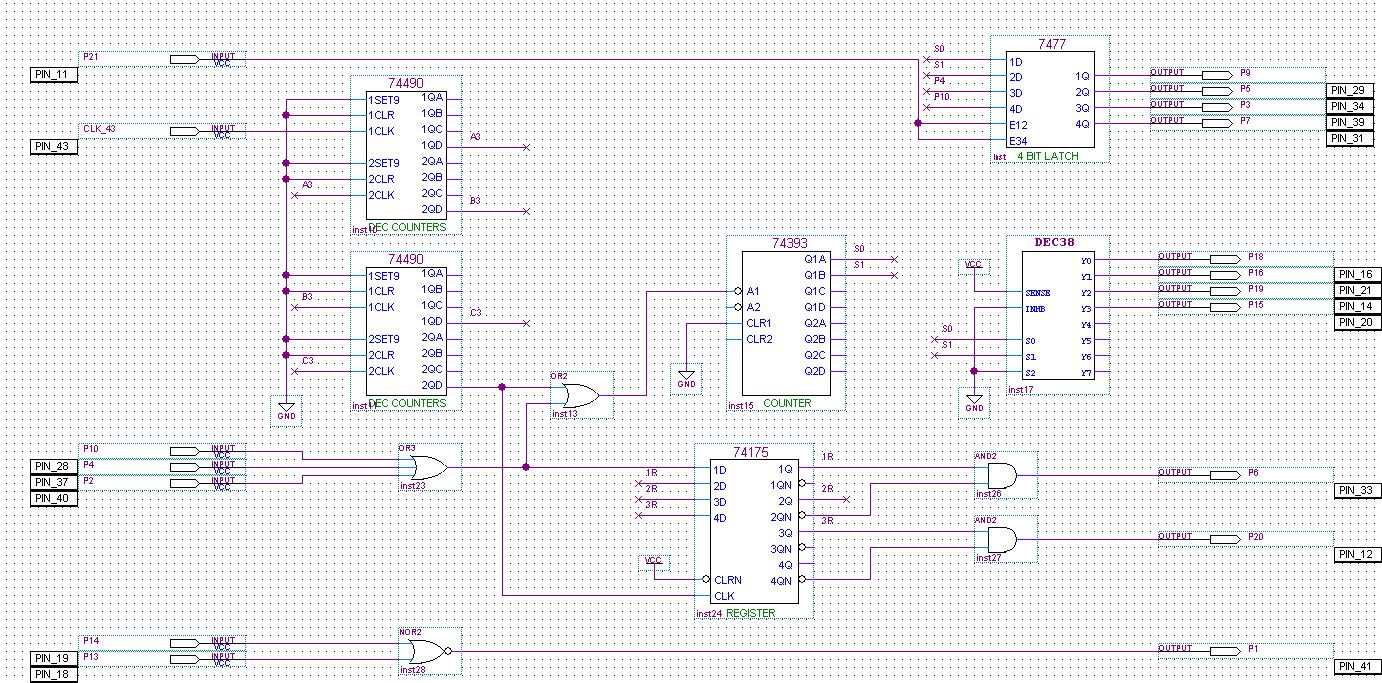
CPLD 設計
CPLD 設計部分,我使用的是 Quartus II 9.1 sp2 Web Edition,相關產品可以至 Altera 官方頁面中註冊並下載。
Quartus II Web Edition Software - Quartus II Web Edition Service Pack 2
下面提供的是 原理圖設計(Schematic Diagram) 的方式,採用這種方式是因為簡單且沒有太多問題(只要是 follow 上面的佈線)。
第一題:四位數多工顯示器
第二題:鍵盤掃瞄裝置
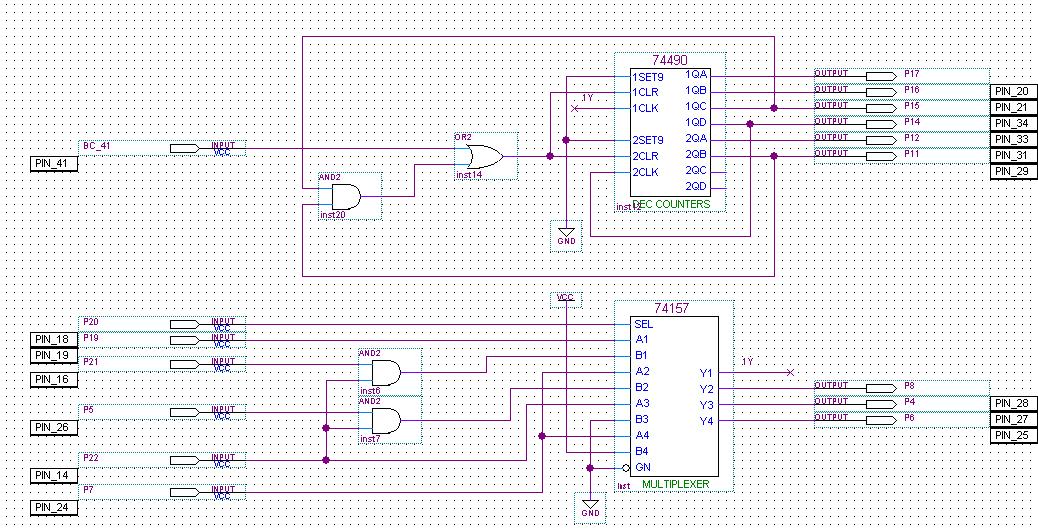
第三題:數位電子鐘
完成檔下載
如果需要原始 qpf 檔案,請點下方《Download》進行下載。
Download
總結
比賽完沒多久就接續投入練習數位電子乙級,其實剛開始也是徬徨無助,不過很感謝我數位電子乙級訓練過程中有廖主任這位指導老師,勤勞的指導我才能順利過關。
如果你問我數位電子乙級必過的絕招,我只能跟你說就是勤加練習,過程中我的指導老師一直跟我說:
不熟沒關係,畫一遍還是不熟,那就三題通通給它畫個十遍,就都熟了。這些都是基本動作
雖然是很簡單的話,不過卻是考檢定是否有通過的關鍵。更是人生學習道路中,很多領域都適用的道理。
考檢定真的沒有太困難點(甲級沒有 open 考題除外),通常最困難的地方就是戰勝怠惰的心。檢定後再整理檔案,統計過我三站板子大概焊了十來張,Layout 圖也畫了近四十次。
所以祝福所有想要考這張證照的人可以順利通過!
Do your best!